


Swageless Fitting Installation Instructions
(View PDF)- Unscrew the cone (bottom housing) and take out the jaw and the copper washer.

Note: The 3 piece jaw has a wire ring to keep them together.
- Insert the cable from the bottom of the housing and place the jaw with the tapped end toward the housing (make sure the 3 piece jaw spreads around the cable evenly), place the copper washer after the jaw, the cable should protrude about 1/8" beyond the copper washer.

- Carefully push the jaws, the washer and the cable all together toward the bottom of the housing. Make sure the cable is still 1/8" out from the washer when the jaw has reached at the bottom of the housing.

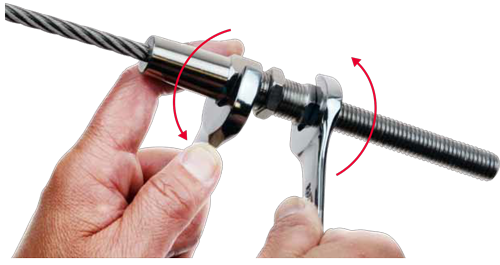
- Screw the head of the fitting to the housing until it stops.

- Use two proper size wrenches, one on the housing and the other one on the head of the fitting and start to tighten in opposite directions as far as possible.
- Screw and tighten the lock nut toward the housing.

It is strongly recommended to use Non-Acidic silicon to seal the tip of the housing around the wire to avoid moisture getting to the inside of the part.
Cable Railing Tension Sequence
