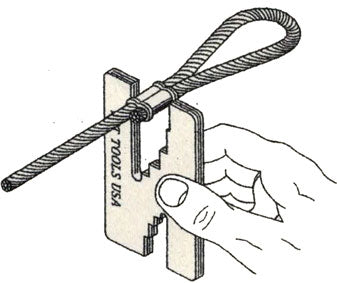
Sleeve and Button Swaging Instructions
Before using this tool, examine and ensure that the bolt and nut of the swager are tight.
Cut cable to the required length and lace the cable through the sleeve so that the end will still protrude after crimping.

Properly insert sleeve into the correct cavity and line up the sleeve between the swager jaws with the long axis perpendicular to the jaws.

Swaging Sleeves
Swage each sleeve with the correct number of swages listed in the table below following the swage sequence shown below.

| Cable Diameter | Swages Per Aluminum Sleeve | Swages Per Copper Sleeve |
|---|---|---|
| 3/64" | 2 | 2 |
| 1/16" | 2 | 2 |
| 3/32" | 2 | 2 |
| 1/8" | 3 | 3 |
| 5/32" | 3 | 3 |
| 3/16" | 4 | 4 |
| 1/4" | 4 | 4 |
| 5/16" | 5 | 5 |
| 3/8 | 5 | 5 |
Lap splices can be made by 2 oval sleeves. Keep a short space between the sleeves.

A stopper can be made by crimping a button stop sleeve.

Check a crimped sleeve with a gauge. If the presses portion won't go into the gauge freely, press the sleeve completely again.
