In this blog we’ll go through detailed explanation of HAAS REVO Lag Tensioners and how to install them.
So to start off, the first thing that we're going to do is grab our marking template and we're going to mark our posts for our holes that we're going to be drilling.
With your holes now marked, the next step is to determine whether you need a 1/2" drill bit or a 9/16" bit. You'll need to use a 1/2" drill bit for soft woods like pine, cedar and fir. For hardwood, such as oak, ipe or mahogany, you're going to use a 9/16" bit.
Now grab your drill and make sure that it's set to its highest speed setting.Align the tip of your drill bit with the mark on your post. Make sure to get the drill as straight and level to the post as possible. Then drill your hole until its depth measures approximately 1 1/4" into your post. Go ahead and repeat this process for all the marks on that side of the post.
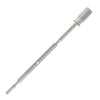
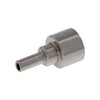
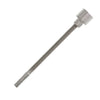
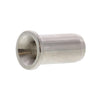
Your HAAS Stainless REVO lag tensioners are going to be composed of five different parts. First you have your lag receiver, which is going to be threading into the half inch diameter hole that you drilled at your post. Next you have your turnbuckle cap which is going to insert into the lag receiver and serves as your wood post protector. Then you have your turnbuckle threaded stud, which is going to be threading into the lag receiver. Then you have your turnbuckle body, which is going to be threading onto your turnbuckle threaded stud. And then lastly, you have your turnbuckle swage stud, which is going to thread into the left-hand side of your turnbuckle body and is going to be what you're attaching your cable to.
With your 3/8" hex socket bit on your drill, slide the lag receiver onto the bit. Set your drill to its lowest speed setting and align the lag receiver to the hole that you've drilled. Make sure that the receiver is a square in relation to the face of the post as you can get it and then screw the lag receiver into the post until it's seated just below the surface of the post. Repeat the same process for all the remaining lag receivers.
At this point, all your lag receivers should be pre-installed at your post, so the next step is going to be to pre-assemble all the lag tensioners that you need for the run. Now this is important because it's going to help you save time and, it's going to help you keep track of all your components. To start grab your turnbuckle body. Now your turnbuckle body is right hand threaded on one side and left hand threaded on the other side.
The left-hand threaded side is going to be designated by a small indicator line that you're going to see here.
Next locate your turnbuckle swage stud, which is going to be left hand threaded. And again, that's going to be threading into the side of the turnbuckle body that has your indicator line. You're going to thread that in so that the threads of the stud are just barely hidden. After you do that, you're going to grab your turnbuckle threaded stud which is right hand threaded. And whenever you go to thread this and you want to make sure that you're threading in the neck-down portion of this stud that has a smaller diameter, and it's got the longer threads. And again, you're going to thread that in so that the threads are just barely hidden inside of the turnbuckle body. Repeat that process for all the remaining lag tensioners for the run.
Now insert the turnbuckle cap into your lag receivers and then thread in all your pre-assembled lag tensioners.
Grab your cable and then pull the cable hand tight so that all the slack is out of the cable. You want to get the cable as tight as you can, so you'll end up with the most accurate fitment whenever your cable is attached to your lag tensioner.
Run the cable just over the top of the turnbuckle swage stud and mark the cable at the second measurement line on the stud.
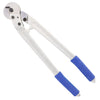
Then use your cable cutters to cut the cable at the mark that you just made.
With your cable now cut, unscrew the turnbuckle swage stud from the turnbuckle body and make sure that the turnbuckle body doesn't rotate when doing so. Insert the end of your cable into the swage cavity of your turnbuckle swage stud, and make sure that the cable is properly seated in the back of the cavity.
Insert the swage stud into the die of your swager and position the die within the swage area on the stud. Once your stud is properly aligned in the die, close the handles of the swager to make your first stage, then slightly open the handles, rotate the cable about 90 degrees, and then make your second and final swage on the stud.
Unscrew your turnbuckle body so that just a few threads on the turnbuckle stud are showing. Then insert the turnbuckle swage stud and cable back into the turnbuckle body and then rotate the turnbuckle body until your lag tensioner is hand tight. Go ahead and repeat this process for all the remaining lag tensioners at the post.
So, now we’ll to complete final tensioning for the run. It's important when completing final tensioning to make sure that you follow a specific sequence, and basically the way that this sequence is going to work is you're going to start with your cable here in the middle. You're going to get that one tightened, you're going to move to the cable directly above it and then directly below it. Continue that same sequence alternating between top and bottom until all the cables for the run are going to be equally tensioned. And you want to make sure that you follow that sequence, not matter how many rows of cable are present.
To begin tensioning up your first row of cable, you're going to just need two tools. You'll need a pair of vise-grips and a hex key wrench or similar type tool. All you're going to do is take your vise-grip and you're going to clamp on to the turnbuckle swage stud that's attached to your cable. The reason that you want to do this is to prevent the swage stud and cable from rotating and twisting, because if it does, your cable will inevitably start to come loose or untied, and you want to have any loose cables on the deck. So, make sure that that swage stud and cable are locked in place with your vise-grip. You're going to take your hex key wrench, insert it through your turnbuckle body and simply, you're just going to rotate your turnbuckle body until your cable reaches the desired amount of tension that you need for your system. You're just going to repeat that same process for all the remaining tensioners at the post. And again, make sure that you're following the tensioning sequence.
Once you've gone through the entire sequence, check the cables to make sure that they are all equally tensioned. If not, tension any cables that may be looser than others. Once all your cables are equally tensioned, this run will be complete.


