In this blog we’ll go through detailed explanation how to install HAAS REVO Lag End Stops.
So to start off, the first thing that we're going to do is grab our marking template and we're going to mark our posts for our holes that we're going to be drilling.
With your holes now marked, the next step is to determine whether you need a 1/2" drill bit or a 9/16" bit. You'll need to use a 1/2" drill bit for soft woods like pine, cedar and fir. For hardwood, such as oak, ipe or mahogany, you're going to use a 9/16" bit.
Now grab your drill and make sure that it's set to its highest speed setting.
Align the tip of your drill bit with the mark on your post. Make sure to get the drill as straight and level to the post as possible. Then drill your hole until its depth measures approximately 1 1/4" into your post. Go ahead and repeat this process for all the marks on that side of the post.
When you’ve finished drilling the holes for your lag end stops, take a pencil or Q-Tip or vacuum cleaner, whatever you really want to use and make sure that all the woodchips are out of these holes. Sometimes these woodchips are going to kind of bind up the hole in your leg receiver and it's going to give you trouble in the future whenever we go to thread in those cables.
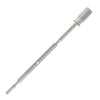
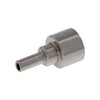
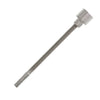
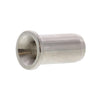
HAAS Stainless REVO lag end stops are going to be composed of three different parts. First, you have your lag receiver, which is going to be threading into either the 1/2" or 9/16" hole that you have drilled in your post. You have the lag swage stud, which is going to be swaged on, or crimped on, to the end of your cable and threading into your lag receiver. And finally, you have your lag receiver cap, which is going to serve as your wood post protector.
With your 3/8" hex socket bit in your drill, slide the lag receiver onto the bit. Set your drill to its lowest speed setting and then align the lag receiver with the hole that you drilled. Make sure that the lag receiver is as square in relation to the face of the post as possible, and then screw the lag receiver into the post until it's seated just below the surface of the post. Repeat this process for all the remaining lag end stops.
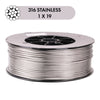
Next, grab your precut cables for the run and slide all your lag receiver caps onto each cable. Slide the cable through the face of the cap so that the legs are pointed towards the end of each cable. Now grab your lag receiver swage studs and slide the cables all the way into the swage cavity of the studs. This will ensure that you get a proper swage.
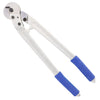
With your swage studs pre-assembled onto your cables, grab your swager and then swage on each stud for all the cables in the run.
Remember when swaging to position the die of the swager within the swage area on the stud. The swage area is between the opening of the stud and the small indentation line that you see here. Make sure to not swage past that mark because doing so can result in a bad swage.

Your last and final step is just going to be to insert your lag receiver swage studs into your installed lag receivers. You're going to rotate your cable clockwise by twisting the cable, and then once it locks into place, you're just going to grab your cap and you're going to insert it into the receiver. And now you're just going to repeat this process for your remaining lag end stops at your post.
And finally, you'll be ready to run your cable through any intermediate post and then attach on your tensioning fitting to finish off this run.


