In this blog, we will guide you through the process of installing two separate cable runs meeting at a corner post using HAAS Stainless Standard Swage Stops and Straight Post Protectors. Please note that the corner post installation process differs from normal end post installations, so follow this step-by-step guide to ensure a smooth setup of your cable run.
Step One: Marking and Drilling Holes
- Start by marking 3/8 inch diameter holes on all four sides of the corner post, using a marking template. Ensure precise measurements for optimal results.
- Utilize a 3/8 inch spade bit to drill the holes. Set the drill at its highest speed and drill more than halfway into the post. Partially back-out the drill bit to clear any wood chips.
- Move to the opposite side of the post and drill until the two holes meet, creating a clean hole through the post.
- Repeat this process for the remaining sides of the post.
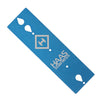
- Slide a Straight Post Protector onto the end of each cable run, ensuring their faces point in the opposite direction of the post.


Step Two: Inserting Cable
Insert each cable into the corresponding holes on opposite sides of the post. Allow the cables to crisscross each other and protrude from the backside of the post.

Step Three: Installing Swage Stops
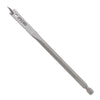
- With the cables inserted through the post, insert one end of a cable into the swage cavity of a standard Swage Stop until it cannot be pushed further.
- Using a Hand Swager, place the Swage Stop into the appropriate jaws that match its size. Position the stop so that the jaws are correctly seated at the swage area mark on the stop.
- Close the handles of the swager completely and make the first swage.
- After the first swage is complete, open the swager jaws, rotate the stop 90 degrees, and make the second and final swage on the stop.
- Once swaged onto the cable, pull any slack out of the cable run and fit the Swage Stop into the holes on the backside of the post.
- Repeat the process for all remaining cable runs at the post.
- Tension all cable runs using the appropriate tensioning fitting installed at the opposite end of each run.
- Finally, slide the Straight Post Protectors into place, covering the swage area on each Swage Stop.


Conclusion For a full video and more information on the HAAS Cable Rail System, please Click Here.
View our YouTube Channel for instructional and informational videos about our products.
If you have any questions or concerns, contact us.
E-Rigging proudly features projects from our creative customer base once a month. If you are interested in having your project featured in an upcoming post, contact: diy@e-rigging.com.
E-Rigging proudly features projects from our creative customer base once a month. If you are interested in having your project featured in an upcoming post, contact: diy@e-rigging.com.